you keep your teeth in your head
For the seat itself you can buy some three to four inch cushioning and mount it on the board. Then you take two cushions and cut them lengthwise. I have a space in the center, which is basically 8 to 12 inches across where your rear end would sit. The upper portion, which are the two sides are for keeping your rear end from sliding over in a turn. The bottom section would look like an arm chair when you are sitting in it. That’s how you want to put the cushions: Two (2) parallel pieces which are 4×4, and you’ll put them on the outside section of your seat.
Your seat its self, the wood part, I would probably use dry wall screws, nails and glue to hold it together. The type of wood is best if it is plywood because it is lighter and stronger. The go-kart I had, I used 3/4 inch birch ply wood. I used birch, because that is what I had available to me (it was scrap wood). If you choose to use some thing thinner and lower grade (like a 1\2 inch or 3\8ths) you’ll notice some flex in the seat , especially 3\8ths. If you’re going to use thinner wood you may want an add additional stiffening underneath the boards, in the frame work, to keep it from flexing.
The side board supports will have to be gusseted otherwise they will snap off on a hard turn. The glue will be very important for keeping the side boards in place as well. You’re not really saving much weight by going 3\8ths. If you’re trying to do that is fine. If you’re going after weight be sure support it well for side loading and flexing.
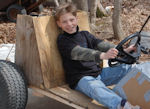
One rule of thumb if your questioning “Is the side support good enough? It is this thing going to hold me?” If you can push it with your thumb (no pun intended) and it flexes it needs support. What you are doing is putting up each 8 to 10 lbs of load into the side support. If it doesn’t move you are pretty good. There has been a lot of time I have gotten onto my go karts, especially new ones, and it has been a bone cracking, teeth jarring experience! The seat was so hard you actually had bruises on your butt. I have seen go-karts where they put plastic seats on them. I can not imagine how ruff a ride that would be!
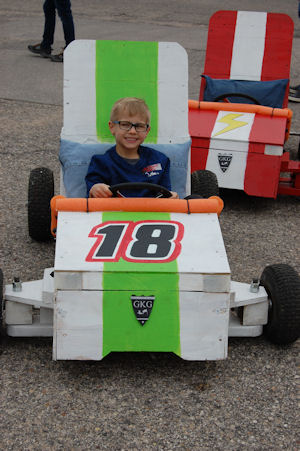
I strongly suggest that you make your own go-kart seat. Go-kart seats are not really that difficult to make. I made 6 or 7 in my life, and every one of them has been a really pleasing, well cushioned hold-you-in-your-seat design. It did not cost a lot of money to do it either. It actually looked like a leather maker made it.

If you go to a fabric store, you can pick up vinyl, which looks like leather and feels like leather and it holds together pretty well in all weather conditions. The nice thing as well is you can put Armor-All and thing like that on it and it shines it right up. The vinyl is very cushiony, it is very pliable, you can staples on it, you can sew on it. I think the last time I looked at it is about $7 a square yard. I mean its expensive there but it is not the end of the world. But if you want to make your own seat, I would strongly suggest that you use vinyl or at least some sort of durable covering that looks decent.
Now you can be fancy and buy your own Riccarro bucket seat, I suppose, but that is not absolutely necessary if you are just making a home made go-kart.
Now, the basic design of the go kart seat is the the “seat” and the “back.” The area where you are sitting and the back. I make them two separate. You can be fancy and take you seat and make it lean back and incline, if you want. I actually put my seat at about 15 degrees back (that’s the most comfortable position.) If you really questioning: “What would be a good seat position?” Then do the following:
- Take two (2) boards put them: one the ground, one in an upright angled position (probably against a wall or preferably against something so that your head is not touching the wall)
- Take two ( 2) pillows and place them on the boards
- Sit on the pillows or cushions
- Try various positions sitting on it
- See what angle you like best
- Mark that angle on a board, remember what that angle is, and incorporate that into your design
The seat the portion where you are sitting: I take two boards and mount them on the side: side support is pretty important especially if you want to stay on. The reason for side boards is that it offers you some side support, so that you do not slide off the seat. You can use a seat belt, but seat belts can be a hindrance, especially if you flip an open-face go kart. It might actually be more dangerous, if you don’t have a roll cage. You can actually get bound up in the go-kart and get hurt.
When you have a roll cage you obviously need a seat belt. The seat belt will keep you from flying out and getting crushed by the roll cage. The major reason for a seat belt is if you hit a tree or something you will not fly out and hit the tree, or your stomach on the steering wheel.
It is important to keep safety in mind
when you are designing your go kart
For the seat itself you can buy some three to four inch cushioning and mount it on the board. Then you take two cushions and cut them lengthwise. I have a space in the center, which is basically 8 to 12 inches across where your rear end would sit. The upper portion, which are the two sides are for keeping your rear end from sliding over in a turn. The bottom section would look like an arm chair when you are sitting in it. That’s how you want to put the cushions: Two (2) parallel pieces which are 4×4, and you’ll put them on the outside section of your seat.
Your seat its self, the wood part, I would probably use dry wall screws, nails and glue to hold it together. The type of wood is best if it is plywood because it is lighter and stronger. The go-kart I had, I used 3/4 inch birch ply wood. I used birch, because that is what I had available to me (it was scrap wood). If you choose to use some thing thinner and lower grade (like a 1\2 inch or 3\8ths) you’ll notice some flex in the seat , especially 3\8ths. If you’re going to use thinner wood you may want an add additional stiffening underneath the boards, in the frame work, to keep it from flexing.
The side board supports will have to be gusseted otherwise they will snap off on a hard turn. The glue will be very important for keeping the side boards in place as well. You’re not really saving much weight by going 3\8ths. If you’re trying to do that is fine. If you’re going after weight be sure support it well for side loading and flexing.
One rule of thumb if your questioning “Is the side support good enough? It is this thing going to hold me?” If you can push it with your thumb (no pun intended) and it flexes it needs support. What you are doing is putting up each 8 to 10 lbs of load into the side support. If it doesn’t move you are pretty good.

The vinyl portion you basically take the seat and lay it on the vinyl cut out. Give your self about 12 inches of space all the way around the seat. Then you flip the seat over onto the vinyl and then you stretch the vinyl around the seat. You may want to have some one to help you do this. If you don’t have someone to help you, then what I do is place one side down and staple in about six (6) spots with electric stapler.
Electric staplers don’t cost that much money. It makes it quick work. Bostich makes a hand stapler. They are pretty tough to work or use plus they don’t penetrate the wood far enough. You want some thing that is going to get into thick wood like the electric stapler and stick. Tacks you can use if you want, but I prefer staples because they do not fall out as easily if at all. Tacks can fall out and pose a hazard to feet and tire.
I prefer staples because they are small, and do the job well and are relatively cheap. A staple gun is well worth the investment.
As far as putting the seat on it, like I was saying, I would staple basically one side and then I was stretch the vinyl, more the center, staple it in on 12 inch centers. This is all in the backside that you are stapling here. What we are trying to do is make the conformity of the seat look like a seat.
Then I would take the sides stretch them lightly over and go around it (it is almost like wrapping a birthday present) and staple the back side. (You don’t have to over staple this thing.) Then I would take some scissors and trim back all the excess. Make sure that you leave yourself some excess in case you have to come back and re-staple it or you can cover it up. The excess provides a shield from the elements as well: for instance water.
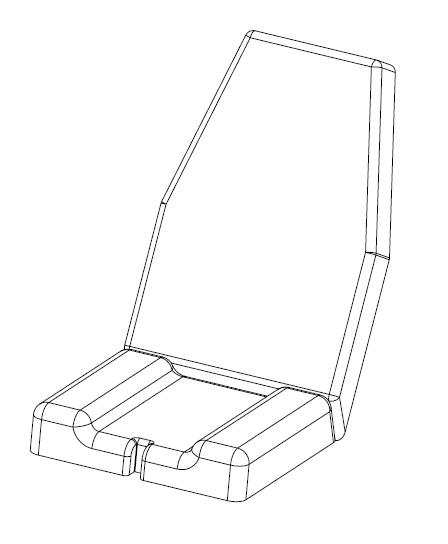
The back of the seat:
The back portion is a little less involved than the bottom. It is pretty much, like I said before, like wrapping a birthday present. I do on the back portion put boards on the side, as well. Those boards are designed for side cornering. I don’t go that elaborate on the back, as putting side cushions (like on the seat portion). You can if you want, but I have not on my designs.
I just basically use the side support more for strength and it keeps the cushion from smashing into the frame and getting as set.
So I take the vinyl stretch it around lightly you do not want to stretch it too much if you stretch it to tightly.
(One of the things I should of told you before is the wood it self is a good idea to take a sander on all the corners of the wood, because the wood itself is sharp and it can slice through the vinyl if you are not careful. I would just take a belt sander and make all sharp edges round so that the vinyl itself does not tear.)
So then you basically on the back stretch it lightly. Do it as if you were wrapping a present. You may want to make some folds. And do some nice folds. Like you see on a box present.. You basically fold it in and try to conceal it as if there is actually a seam. And you do the same thing with wrapping the seat vinyl.
After all the seats are completed then you mount it to the frame work of the go cart. On my frames I provided several plates were you can screw into the seat back. And the nice thing about my design is that there is only one screw. You just zip that screw out and pull off the back and get at the engine.
Now I would actually suggest to do something better than that and have a quick disconnect. You can quick disconnect the seat and get at the engine.
If I were to say that there is any disadvantages to my design, that would be: The seat is in the way for some issues, that would be for instance, filling the engine with the oil easily. The filler, on a Briggs is easier to get at on the front side than the back side, so pulling the seat out of the way is ideal.
That pretty much sums up seat construction and design.
You can get more elaborate with seats. I’ve heard of people taking Great-Stuff and putting it in garbage bags and sitting on the bag. For about 10 minutes it will set and then have a seat. The trouble with that is it’s kind of a hard seat because the great stuff is hard. It is not super hard , but it is not soft either. So I would strongly suggest that you don’t use a very hard seat either. There is no reason that you need to have your bones cracking while you are riding your go-kart. It is more fun to go on your go-kart with some cushioning. Especially, if you don’t have suspension. A good soft seat serves that purpose.