If you have studied the internet and the various options for making go carts they all vary between a five-point method or eight point method. In either case we’re going to try to summarize the methods into simple steps so that a go kart can be put together in a few weeks.
Step Number One: Person Space/Engine Space
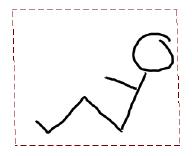
Person Space Layout Box
The person space consists of where the driver will sit. Where and how far the driver will extend forward. There are no hard and set rules for how big this space is. It depends on how large the person is that is going to be driving the go kart. The person space is basically a large rectangle that extends the whole distance of the person in length and height.
The best way to measure the person space is to have the potential driver sit up against a board that is slanted up against the wall. Measure the height and the length of the sitting position of this person. Keep the dimensions handy, obviously, and written down somewhere for future use.
Engine Space
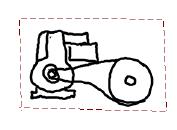
Engine Space Layout
The engine space is similar but it requires an understanding of the drive system layout. To start the engine needs to be measured both in height width and length.
Then the associated relationship between the drive axle and the engine clutch system needs to be approximated or measured. Typically, as a rule of thumb, the diameter of the rear sprocket is about 75% to 85% of the diameter of the rear wheel. The diameter of the drive axle will be the outer border of the engine space.
Typically the engine space will be about 18 to 20 inches in length and about 16 inches in height and about 18 inches wide.
Again measure the engine and the drive system approximately.
Designing Your Frame
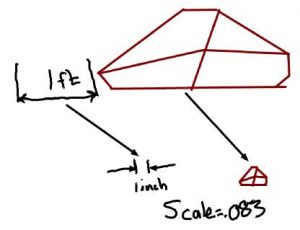
Scale down your frame design so you can design it on paper. Use a scale of 1 foot = 1 inch.
The frame design of the go kart should include a roll cage so that optimum protection of the driver is achieved. So what is required is a general layout from a 2-D standpoint on a piece of paper to start.
I cannot stress how important it is to first develop a 2-D sketch before diving in and just cutting tubes and welding things together. The reason for this is you will end up spending a lot of time reworking and wishing that you had not just plowed ahead.
The technique for developing a 2-D drawing is pretty simple but it requires that you understand scaling. Scaling itself is not difficult it just requires that you understand how to use a calculator and a ratio system pretty easily.
A good scale to use is 1 inch equals 1 foot or 1 inch equals 12 inches. The resulting ratio will be one real inch will equal 1/12 of an inch or multiply .0833 times every real dimension. This will scale down the dimensions that you are coming up with for the person space for example and make it fit into an 8.5 x 11 piece of paper easily.
You will use this ratio system to convert your large dimensions such as your person space which may be 36 x 42. You need to scale that into a small package that will fit on a piece of paper and the representative of your go kart design.
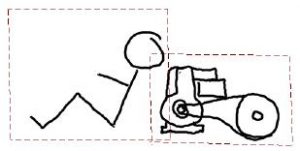
Person and engine spaces layed out prior to frame development
The next step is to cut out the person space and the engine space into rectangular shapes. Then the shapes are placed on a piece of paper in the relative position that you would expect the person to sit and the engine to be.
This is the initial placement of the engine space/person space relationship. The next step is to start drawing and sketched out frame. Try to sketch out at least three or four different frame styles and then compare them. Choose the best or the average of all the systems and then make a final sketch of a go kart design.
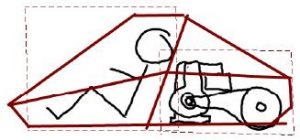
Initial frame layout using the person space, and the engine spaces as guides. The wheels will next need to be placed for optimum Center of Gravity location
This will represent what the go kart will look like from the side.
The next step is to place the wheels on the front of the go kart.
There some important considerations to make when you’re placing the wheels and they are:
– Center Of Gravity Placement
– Pedal Placement
– Steering Layout Arrangement
– Feet Clearance
– Overall Weight
The center of gravity placement is pretty important for the performance of the go kart and is a balance between weight and overall wheelbase to width stability ratio. If the placement of the center of gravity is not correct you can have an oversteer or understeer situations which have their own set of problems such as crashing into things easy or as a backend whipping around too easy causing an excessive instability situation while driving the go kart.
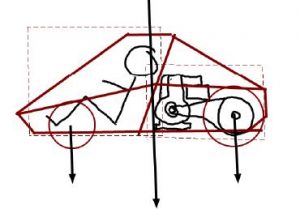
Go kart center of gravity. The center of gravity needs to be taken into acount prior to placing to front wheels.
All the things listed above need to be taken into consideration before finalizing your design. You may end up sketching three or four times again before you finalize on your design because your feet for example may not have enough clearance, or your center of gravity is out of kilter or your steering placement may not be where you wanted to be.
So keep this in mind before you place your front steering system. Additionally you do not want your go kart to be too long or it will be difficult to control and tend to understeer severely. A good balance of weight is required.
Be sure to go to when we talk about the center of gravity and how to calculate it.