
It has been a couple weeks since we’ve released a blog entry and I’m sorry about that, but I have been quite busy. I’ve been busy with making fiberglass molds for a product that I’m developing.
I’ve been using the fiberglass tool article that I wrote as a baseline for the
design of my tools. It has been quite a successful project, a little dusty, but has been pretty exciting and interactive with my kids.
Just to give you little bit of the background, I have another business called the turtletub.com that I started about 10 years ago. This turtle tub business consists of pools that you put in a reptile cage or a turtle terrarium and provides a swimming area for the pet to the soak and swim.
When I first started my business back 10 years ago I had some vacuum form tools that I made parts off of. I got them pretty cheap. Back then, I initially was guessing what the market wanted. I did some market research at some pet stores and got a general idea of what the market wanted. But the reality was that the market wanted something bigger and better.
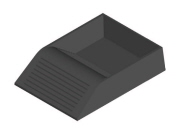
Turtle Tub III, newly developed product, using the fiberglass mold concept from inception. This particular pool is able to hold up to 4 gallons of water and sits well in 40 gallon aquariums. Releasing this pool with the fiberglass molding concept enables us to shift gears and put our tooling dollars where the market wants. If this part doesnt work out, we can just stop making it and not sweat loosing thousands of dollars.
In the past couple of years I’ve been able to market myself more effectively using the Internet and the help of Internet Marketing Specialist (the Go Kart Guru being one of those marketing projects) and so I have been able to develop a new product called the Turtle Tub III and the Turtle Tub 1B. Using market research tools I’ve been able to develop these two products and I’m going to introduce them into the marketplace and then later hard tool them.
Part of product development is a figuring out what the final product is going to be. This can be a tricky process especially when you don’t have a lot of money to throw around. Just to give you some perspective, a typical tool to make a turtle tub runs around $2000. Finding out what the market wants is a tough challenge because there are a wide variety of users and a wide variety of applications. Developing a product that meets all these criteria can be a challenge especially under $200.
The fiberglass tool helps break that barrier. A relatively simple part can be
developed for under $100 and presented to the public for use. So in the past couple of weeks I’ve been working on two different tools, which translates into Two different parts. They will soon be released for purchase on the turtletub.com website.
As with most of my stuff I design it on a CAD program. Some relatively cheap programs can be had on the Internet for under $50 bucks. I have an old version of Cadkey that I got many years ago. It is a very powerful drawing package with solids and so on that can get the job done just fine. The nice thing about Cadkey is that you can export files to toolmakers and have your final product made professionally.
First, the toughest part about developing the whole mold is getting the inside surface of the mold sanded on off so that it does not look all scratched and hacked up.
Secondly, it is important to have ample draft on the tools so that the parts can be pull out easily. If zero draft is designed into the part it will be difficult to remove the part from the mold. The draft makes the part pop out of the tool easier.
Thirdly, it is important that you provide sufficient clearance between the surfaces of the parts so that the layers of fiberglass can be laid up into the tool. In other words a tie section will be difficult to put together in a mold. When you try to pull a part out you’ll have a lot of air pockets and voids. What this will translate into is a lot of rework required on the final part. Re-work being adding filler compound to the part itself and then sanding it off.
Fourthly, I was also talking to a local fiberglass shop and they told me that using a latex type paint works well with fiberglass too. The latex paint does not adhere to the fiberglass epoxy resin very well, especially if it is coated with a mold release compound. That begs the question;? What is a good mold release compound?? Good old fashioned Turtle Wax TM will do the trick.
Why Fiberglass Tooling?
If you are developing your own go kart design it is often a nice touch to add some plastic type ground effects or spoilers. It can be pretty expensive to buy ground effects parts especially if they don’t match up to your design. Making your own tools is the simplest and cheapest way to getting the go kart that you want. A simple tool can be developed in less than three hours using plywood, two by fours and simple drywall screws.
Again as the article that we wrote before discussed using a quick set to rock type compound which hardens in 20 minutes is ideal for filling in corners and filling in the woods grain patterns.

Cool niche that your business is in. Glad to hear the project was a success.
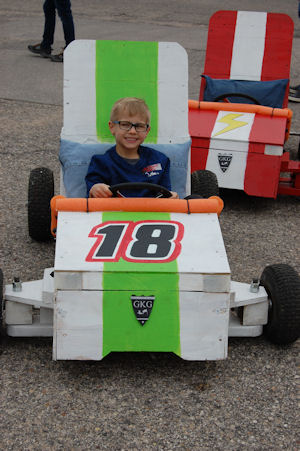
I’ve been looking at your business too, and it looks like a cool indoor go kart arena. Love to visit sometime when we get out in the Colorado area. Electric go karts…we are gonna have to talk.. in a good way. I want to know a little bit more, I’ve got some ideas…
Regards
GKG